Insert - Editor Table Menu
 This command can be executed from the Editor
Toolbar
This command can be executed from the Editor
Toolbar
Table -- This command opens the Insert Table dialog box to design a professional Formatted Table for organizing text and data into rows, columns and cells. Tables are for displaying organized data in your section.
Click below to learn more about the available actions:
 SpecsIntact Tables are only available in SpecsIntact v4.3.0.xxx.
The Unified Facilities Guide Specifications
(UFGS) have not yet begun to use the Formatted Tables within the Guide
Specifications. Before
you begin using SpecsIntact Tables it is recommended everyone working
on the project use the latest version of SpecsIntact that supports the
Formatted Tables.
SpecsIntact Tables are only available in SpecsIntact v4.3.0.xxx.
The Unified Facilities Guide Specifications
(UFGS) have not yet begun to use the Formatted Tables within the Guide
Specifications. Before
you begin using SpecsIntact Tables it is recommended everyone working
on the project use the latest version of SpecsIntact that supports the
Formatted Tables.
Other features available from the Insert cascading menu once the Formatted Table has been created provides the capability to insert rows or columns above or below the selected cell.
Example of a New Table:
![]()

Tips and Tricks for Working with SpecsIntact Formatted Tables:
 Before you begin editing a new Formatted Table it is important to understand how they function.
SpecsIntact
Formatted Tables are a unique breed specifically designed for the SpecsIntact
Editor. There are several menu items available while working in tables,
either by choosing the Table drop down
menu or taking advantage of the right-click
menus.
Before you begin editing a new Formatted Table it is important to understand how they function.
SpecsIntact
Formatted Tables are a unique breed specifically designed for the SpecsIntact
Editor. There are several menu items available while working in tables,
either by choosing the Table drop down
menu or taking advantage of the right-click
menus.

Caution: In
order to save edits in tables, the cursor must
be in a blank cell or outside
of the table.
The
Edit Mode -- is
activated by left-clicking in a cell to begin inputting the data, formatting
or tagging.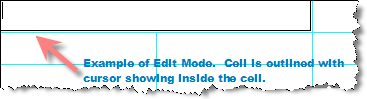 Note while in the Edit Mode the SpecsIntact Editor will not
display colors, and will always show hidden text and tags. These
limitations will not apply when viewing or printing tables. Also,
the Merge and Unmerge
features are not available from the Table
Menu unless two or more cells are selected or the cell is a merged
cell.
Note while in the Edit Mode the SpecsIntact Editor will not
display colors, and will always show hidden text and tags. These
limitations will not apply when viewing or printing tables. Also,
the Merge and Unmerge
features are not available from the Table
Menu unless two or more cells are selected or the cell is a merged
cell.
Using
the SI Editor's Right Click Menu for Tables -- There
are two right-click menus available while working with Formatted Tables.Note the Merge and Unmerge features are not available from
the Table Menu or the Editing
Menu unless two or more cells are selected or the cell is a merged
cell.![]() The first menu is activated by simply placing the mouse over
the row or cell then right-clicking.
This is
the Table Menu.
The first menu is activated by simply placing the mouse over
the row or cell then right-clicking.
This is
the Table Menu.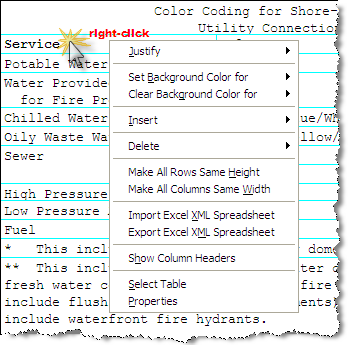
This menu provides options available for changing the entire table
The second menu is an Editing Menu
that is available while in Edit Mode.
To activate
the Edit Mode menu simply click in the cell, then right-click. 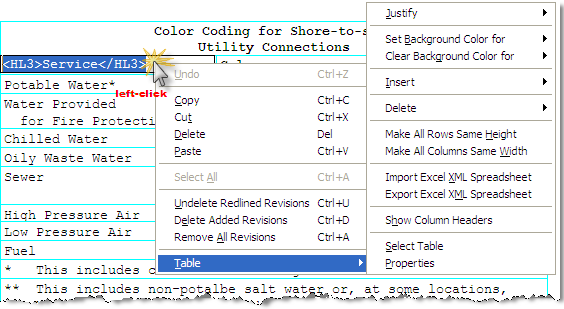
The Edit Menu provides features
such as Copy, Cut, Delete, Paste, Undelete Redlined Revisions, Delete
Added Revisions, and Remove All Revisions. For
additional convenience this menu also provides an extensive pop-up Table Menu.
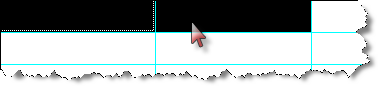
Selecting
Columns, Rows or Cells -- must
be done by selecting the first
cell, holding down the Shift key and
clicking on the additional cells.
and
clicking on the additional cells.
 It is recommended that while working with SpecsIntact Tables
the View | Tags
It is recommended that while working with SpecsIntact Tables
the View | Tags command is turned off. It
also is encouraged to enter all of the information into the table prior
to tagging. This
will make editing in SpecsIntact Tables less complicated.
command is turned off. It
also is encouraged to enter all of the information into the table prior
to tagging. This
will make editing in SpecsIntact Tables less complicated.
Caution: Placing text or brackets on the same line as formatted tables will cause display issues.
Tables can be tailored and the Tailoring Option tag can be on the same line as the new Formatted Tables (TAB tags).
![]()
SpecsIntact will continue to support older style tables (using TBL tags) indefinitely.